Fermenting Your Own Plant Based Dairy Alternatives

Why should you bother fermenting your own vegan dairy?
Are you tired of paying a premium for plant-based yogurts that are packed with thickeners and refined sugars? This guide covers the practical methods for fermenting your own plant-based dairy alternatives, including vegan yogurt, kefir, and cultured nut cheeses. By mastering these techniques, you'll gain control over your ingredients, save money, and develop a much deeper understanding of how microbes transform simple plant milks into probiotic-rich staples.
Fermentation is more than just a culinary trend—it’s a fundamental way to preserve food and improve digestibility. When you ferment plant milks, you're essentially using beneficial bacteria to break down complex starches and sugars. This process makes the final product easier on your gut and creates those tangy, complex flavors that store-bought brands often lack.
You don't need a laboratory to do this. You just need patience and a few basic tools. We'll look at the science of different starters, the best bases to use, and how to avoid common mistakes that lead to spoilage.
What are the best plant bases for fermentation?
The best plant bases for fermentation are high-protein milks like soy or cashew milk because they provide the necessary nutrients for bacteria to thrive. While you can use almost any nut or grain milk, the fat and protein content dictates the final texture and stability of your product.
Soy milk is the gold standard for beginners. It has a protein profile that closely mimics cow's milk, making it incredibly easy to turn into a thick, yogurt-like consistency. If you're looking for something more indulgent, cashew milk is a fantastic option. Cashews are high in fats, which results in a creamy, decadent texture that works well for "cheese" styles. Coconut milk is also great, but be warned: it can become very heavy and thick, which might not suit everyone's palate.
Here is a quick breakdown of how different bases behave during the fermentation process:
| Base Type | Texture Result | Best Use Case |
|---|---|---|
| Soy Milk | Smooth, yogurt-like | Standard vegan yogurt |
| Cashew Milk | Creamy, dense | Cultured nut cheeses |
| Coconut Milk | Rich, thick | Dessert-style fermented creams |
| Oat Milk | Thin, slightly viscous | Kefir-style drinks |
A word of caution: avoid using oat milk for long-term cheese fermentation. The starch content can sometimes lead to a "slimy" texture if the temperature isn't strictly controlled. It's a bit finicky (to say the least).
How do you make vegan yogurt at home?
To make vegan yogurt, you must combine a high-protein plant milk with a specific starter culture and maintain a steady temperature for several hours. Most people find that soy milk produces the most reliable results when using a commercial vegan starter or a veganized yogurt culture.
First, you'll need to prepare your milk. If you're making your own milk from scratch, ensure it is unsweetened and lacks additives like carrageenan. Carrageenan can interfere with the way the bacteria interact with the liquid. Once your milk is ready, heat it slightly to about 180°F (82°C) to neutralize any unwanted microbes, then let it cool to roughly 110°F (43°C).
This is where you add your starter. You can use a few tablespoons of a high-quality vegan yogurt like Forager Project's yogurt or a specialized vegan probiotic powder. Stir it in thoroughly. Then, keep the mixture in a warm place—an oven with the light on works perfectly—for 8 to 12 hours. The longer it sits, the more tart it becomes.
The catch? If you don't keep the temperature stable, the fermentation will stall. If the temperature drops too low, the bacteria go dormant. If it gets too high, you'll kill the culture entirely. It's a delicate balance.
Common Troubleshooting Tips
- Too runny? Your starter might have been weak, or you didn't wait long enough. Next time, try adding a bit of agar-agar or starch to thicken the base before heating.
- Too sour? You likely left it too long or the ambient temperature was very high.
- Grainy texture? This often happens with cashew or almond bases if the milk wasn't blended smoothly enough before the process started.
Can you ferment plant-based "cheese" using kefir grains?
Yes, you can use water kefir grains or specialized vegan kefir grains to create fermented, probiotic-rich plant-based beverages and even soft cheeses. While traditional kefir is dairy-based, many enthusiasts use kefir grains to ferment coconut water or sweetened nut milks.
Using kefir grains for plant-based fermentation is a bit different than making yogurt. You're working with a symbiotic culture of bacteria and yeast (SCOBY). For a "cheese" style, you'll want to use a thick, fermented nut milk base. The goal is to allow the grains to consume the sugars and create an acidic environment that preserves the structure.
Here is the general workflow for a fermented nut cheese:
- Prepare the base: Blend soaked cashews with water until it is completely smooth.
- Inoculate: Add your probiotic culture or a small amount of kefir grains.
- Ferment: Leave the mixture at room temperature in a glass jar with a breathable lid.
- Strain: Once it reaches your desired tanginess, strain the mixture through a nut milk bag or cheesecloth to separate the liquid from the solids.
- Age: Place the solids in a way that allows them to firm up in the refrigerator.
The texture of your "cheese" will depend heavily on how much liquid you can successfully strain out. If you want a spreadable consistency, don't over-strain. If you want something closer to a firm block, you'll need to be much more thorough with your cheesecloth.
One thing to watch out for is the "funk." Fermentation can sometimes produce smells that are quite pungent. This is normal, but there is a line between "tangy" and "spoiled." If you see any colorful mold (pink, black, or green), throw the whole batch out immediately. Don't risk it.
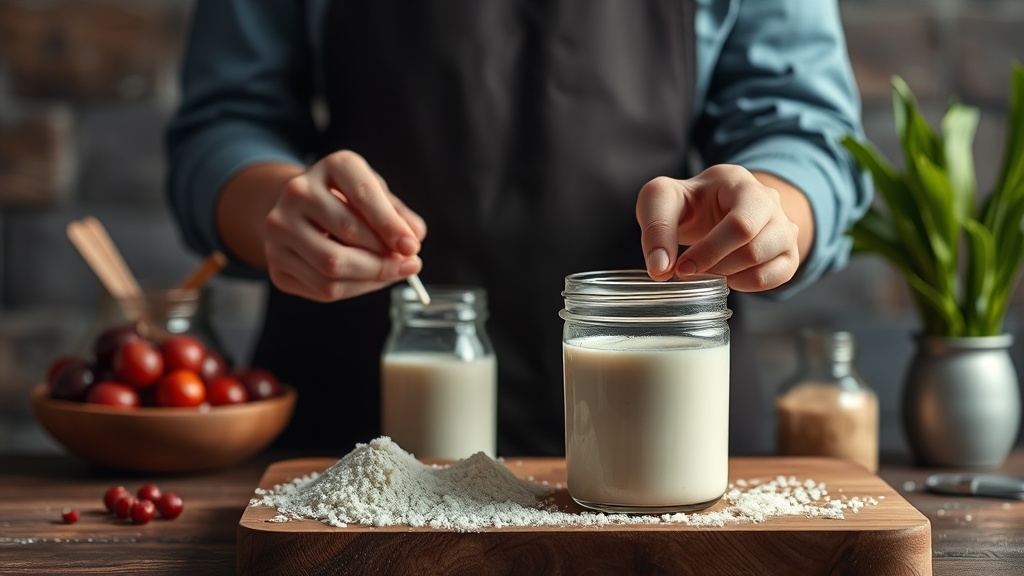
What equipment do I actually need to get started?
You don't need a massive investment to start fermenting, but having a few specific tools will make the process much more consistent. Most of these items are standard kitchenware you likely already own.
A glass jar is your best friend. Avoid plastic if possible, as the acidity of fermented foods can sometimes leach chemicals from lower-quality plastics. A mason jar is perfect for both the fermentation stage and the storage stage. You'll also want a fine-mesh strainer or a nut milk bag—this is non-negotiable if you want to make anything resembling cheese or thick yogurt.
A digital thermometer is also worth the small investment. Precision matters. If you're guessing the temperature of your milk, you're essentially playing a game of chance with your bacteria. You want to be able to hit that 110°F sweet spot every single time.
If you're feeling serious about it, a dedicated yogurt maker or a fermentation crock can help maintain a stable temperature, but a simple insulated cooler or even a warm corner of your kitchen is usually enough to get the job done.
The beauty of this process is that it's a skill you build over time. Your first batch might be a bit thin or a little too sour, but that's part of the learning curve. Eventually, you'll know exactly how your specific brand of soy milk reacts to your specific starter culture. It's a deeply rewarding way to take control of your food. Just remember to keep your tools clean—sanitation is the most important rule in any fermentation project.